Table of Contents
- Start With an Energy Audit Before You Spend a Dollar
- The AC Maintenance Checklist That Cuts Cooling Costs
- Energy Efficient Thermostat Settings for Every Schedule
- Signs Your AC Needs Repair (And What Delaying Costs You)
- Seal the Thermal Envelope: Insulation, Weatherstripping, and Draft Detection
- Control Humidity and Airflow to Reduce Cooling Load
- HVAC Sizing, SEER Ratings, and the Long-Term ROI of Upgrades
- Conclusion: Your Next Step to Lower Summer Cooling Bills
- Frequently Asked Questions
Last Updated: October 4, 2026
Start With an Energy Audit Before You Spend a Dollar
Learning how to lower summer cooling bills starts with one step most homeowners skip: finding out where the money actually goes. An energy audit pinpoints air leaks, weak insulation, and failing equipment before you spend a cent on fixes.
An audit stops that.
The U.S. Department of Energy home energy assessment guide recommends a professional assessment before any major efficiency purchase.
Free and Low-Cost Audit Options
You have three paths, and two cost nothing:
- DIY walk-through: Check for drafts around windows, doors, and outlets on a windy day.
- Utility programs: Many power companies offer free or discounted home energy audits. Ask yours.
- Professional audit: A technician uses a blower door and thermal camera to find hidden leaks.
Start with the free options. They often reveal the biggest problems.
The cheapest audit trick we know: hold a lit incense stick near windows and door frames on a breezy day. The smoke wavers where air sneaks in. It costs nothing and finds leaks fast.
The AC Maintenance Checklist That Cuts Cooling Costs
A dirty AC unit works harder and cools less. Regular maintenance is the most reliable way to cut cooling costs without buying anything new.
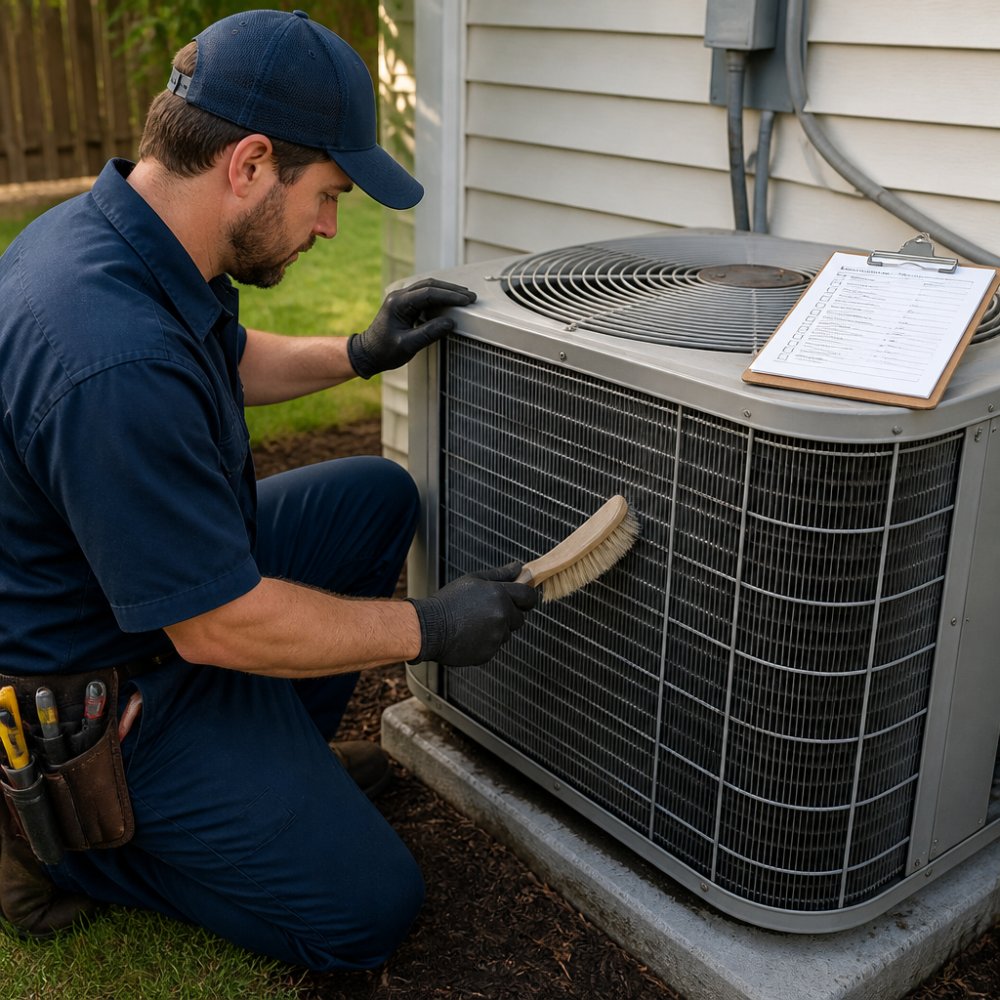
Run through this AC maintenance checklist each month during summer:
- Replace or rinse the air filter
- Clear leaves and debris from the outdoor unit
- Check that vents are open and unblocked
A clogged filter alone can raise energy consumption noticeably. It is the easiest fix on the list.
Monthly Tasks vs. Annual Professional Tune-Ups
Monthly tasks are yours. Annual tune-ups belong to a licensed technician.
A pro tune-up covers what you cannot safely do yourself:
- Testing refrigerant levels
- Cleaning the condenser and evaporator coils
- Checking electrical connections
Skipping tune-ups shortens your system’s life and raises your utility bill reduction potential. The ENERGY STAR maintenance guidance notes that well-maintained equipment uses less energy over its lifespan.
If you are in Madison County and want this handled right, 1st Service HVAC offers tune-ups.
Energy Efficient Thermostat Settings for Every Schedule
Energy efficient thermostat settings are the fastest way to cut cooling costs, because they change nothing but the number on the wall. The U.S. Department of Energy recommends keeping your home warmer when you are away and cooler only when you are there.
Here is a simple schedule that works for most families:
| Time of Day | Setting | Why It Works |
|---|---|---|
| While you sleep | 78°F | Body temp drops; you stay comfortable |
| While you are at work | 82°F | No one is home to notice |
| Evening at home | 75°F | Peak comfort hours |
| Overnight cooldown | 78°F | Balances rest and cost |
Raising the temperature a few degrees for eight hours a day adds up. Small changes beat big sacrifices.
Programmable vs. Smart Thermostat: Which Saves More?
A programmable thermostat follows a fixed schedule you set once. A smart thermostat learns your habits and adjusts on its own. Which saves more depends on your routine.
- Predictable schedule: A programmable model is enough. Cheaper and simple.
- Irregular schedule: A smart thermostat wins. It adapts when your plans change.
The EPA thermostat information points out that smart models can cut heating and cooling waste when used correctly.
A thermostat only saves money if you actually program it. An unprogrammed smart thermostat is just an expensive wall decoration. Set the schedule the day you install it.
Signs Your AC Needs Repair (And What Delaying Costs You)
Catching signs your AC needs repair early saves money. Waiting turns a small fix into a full replacement.
Watch for these warning signs:
- Weak airflow from vents
- Warm air instead of cool
- Strange smells or noises
Any one of these means your system is straining. A straining system burns more power to do the same job.
What does delay cost you? A minor refrigerant leak becomes a compressor failure. A worn capacitor becomes a dead motor on the hottest day of July.
Ignoring a small refrigerant leak does not just raise your bill. It can freeze the coils and kill the compressor, turning a simple repair into a full system replacement. Fix leaks early.
If your AC is acting up, call a licensed technician before the problem grows.
Seal the Thermal Envelope: Insulation, Weatherstripping, and Draft Detection
Your thermal envelope is the barrier between your cool indoor air and the hot outdoors. Every gap leaks money, and air sealing is one of the highest-return, lowest-cost efficiency moves a homeowner can make, if you do it in the right order.
Seal First, Insulate Second
This mistake wastes the most money. Insulation slows heat transfer but does not stop air movement. Add insulation over a leaky attic floor and air still flows through and around it, so you have paid for underperforming material.
The correct sequence is: air seal first, then insulate. Stop the air, then slow the heat.
Where the Leaks Actually Are
Most air leakage is not around the obvious drafty window. It concentrates in a few easy-to-miss spots:
Reach out to us for more information… →
- The attic hatch or pull-down stairs. Often the single largest leak in a home, and the easiest to fix with weatherstripping and an insulated cover.
- Recessed light fixtures and ceiling penetrations. Can lights and wiring holes punch straight through the ceiling plane.
- Plumbing and electrical penetrations under sinks, behind outlets, and where pipes pass through walls.
Draft Detection: Free and Cheap Methods
You do not need to guess. Two low-cost methods find leaks fast:
- The smoke test. On a breezy day, hold a lit incense stick or a smoke pencil near window frames, door edges, outlets, and the attic hatch. Where the smoke wavers or gets pulled, air is moving. It costs almost nothing and works surprisingly well.
- A handheld thermal leak detector. These inexpensive infrared tools show temperature differences on a surface, so a cold spot on a hot day reveals where outside air is entering. More precise than smoke, still affordable.
For a whole-house picture, a professional blower door test pressurizes the home and quantifies total leakage, telling you how much you are losing before you spend on fixes.
The Three Fixes, Ranked by Payoff
- Air sealing (weatherstripping and caulk). Foam or rubber strips around doors and windows, caulk around penetrations, and a cover for the attic hatch. Materials are cheap and the labor is DIY-friendly. This is usually the best return per dollar.
- Attic insulation. Heat pours through a poorly insulated attic, and the attic is where summer heat gain concentrates. Adding or upgrading attic insulation is a larger job but a durable one.
- Duct sealing. If your ducts run through a hot attic, leaks there dump cooled air into a space you are not trying to cool. Sealing accessible duct joints is often overlooked and high-value.
The Cost-Benefit Reality
Air sealing is the classic quick win: low material cost, immediate effect on your next bill, no equipment to maintain. Insulation and duct work cost more upfront but pay back over years through reduced cooling load.
Before you buy anything, run the smoke test around your attic hatch and exterior door bottoms. Those two spots alone account for a surprising share of summer air leakage, and both are fixable with a few dollars of weatherstripping.
Control Humidity and Airflow to Reduce Cooling Load
Most guides treat humidity as a footnote. In practice, moisture removal is often the biggest hidden driver of your summer cooling bill.
Here is the concept that changes how you think about cooling: your AC removes sensible heat (the temperature you feel on a thermometer) and latent heat (the energy stored in water vapor).
That is why a house at 76°F with 60% relative humidity can feel worse than one at 78°F with 45%. Your comfort tracks moisture as much as temperature.
How to Tell Humidity Is Your Problem
You do not need a lab. A common pattern looks like this:
- The thermostat reads a comfortable number, but the air feels clammy or sticky.
- Windows and cold pipes sweat in summer.
- The AC runs in short bursts and shuts off before the house feels dry.
A cheap hygrometer (a handheld humidity meter) tells you the number. Most practitioners aim for indoor relative humidity between roughly 30% and 50% in summer. Above that range, you are paying to cool water vapor.
Dehumidifier vs. AC Settings: Which Actually Saves Money
This is the trade-off competitors skip.
Lowering the thermostat removes more moisture, because a longer AC run cycle pulls more water out of the air, but you pay with a colder house and more runtime.
A standalone dehumidifier removes moisture without overcooling.
The right answer depends on your climate. In a dry climate, a dehumidifier is usually wasted money. In a humid one, it is often the highest-value appliance you can add.
Airflow: The Other Half of the Equation
Moisture control and airflow work together. Stagnant air lets humidity pool in closed rooms.
- Run bathroom and kitchen exhaust fans while showering or cooking, and let them run a few minutes after. They vent moisture at the source before your AC has to remove it.
- Keep interior doors open so return air can circulate. A closed bedroom door can starve the return and trap damp air.
- Set ceiling fans to counterclockwise in summer for a cooling downdraft. Fans do not lower the temperature or the humidity, but moving air across your skin lets you feel comfortable at a higher thermostat setting.
The counterintuitive rule: on a humid day, a slightly warmer house with a dehumidifier running can feel better and cost less than a colder house fighting moisture with the AC alone. Control the water, not just the temperature.
HVAC Sizing, SEER Ratings, and the Long-Term ROI of Upgrades
Here is the part most guides skip: the wrong system size wastes money no matter how well you maintain it.
An oversized AC cools too fast, then shuts off before it removes humidity.
What about the long-term ROI of home improvements? Sealing, insulating, and upgrading equipment pay you back over years through lower bills.
This is where HVAC system sizing and efficiency ratings matter most.
Homeowners planning to stay in their home five or more years. The upfront cost of a right-sized, high-efficiency system pays back through years of lower cooling bills and fewer repairs.
If your system is old and struggling, ask about affordable financing options to spread the cost.
Conclusion: Your Next Step to Lower Summer Cooling Bills
Cutting summer cooling costs is not one magic fix. It is a stack: an audit, steady maintenance, smart thermostat settings, sealed drafts, and right-sized equipment.
Most homeowners can handle the free steps today. The bigger decisions, like repairs, sizing, and upgrades, are where a licensed team earns its keep.
At 1st Service HVAC, our family-owned team brings over 45 years of HVAC experience to every job.
Call 1st Service HVAC today to schedule a tune-up or system check and start lowering your summer cooling bills.
Frequently Asked Questions
What is the cheapest way to keep my house cool in the summer?
The cheapest methods combine free behavioral changes with low-cost fixes. Set your thermostat to 78°F when home and higher when away using energy efficient thermostat settings. Use ceiling fans to circulate airflow so the room feels 3-4°F cooler. Close blinds on south- and west-facing windows during peak sun. Seal air leaks around doors with weatherstripping. These steps cost little or nothing and can reduce cooling load noticeably before you spend on bigger upgrades.
How often should I schedule professional AC maintenance?
Schedule a professional tune-up once per year, ideally in spring before peak demand hits. A technician will clean coils, check refrigerant levels, inspect electrical connections, and test the capacitor and compressor. Between visits, follow a monthly AC maintenance checklist: replace or rinse filters every 30 days, clear debris from the outdoor unit, and check that vents are unobstructed. Annual service keeps the system running at its rated SEER efficiency and catches small issues before they become expensive repairs.
Does a programmable thermostat actually save money?
Yes, when you use it consistently. A programmable thermostat lets you set higher temperatures during work hours and overnight, reducing runtime by several hours per day. The Department of Energy estimates savings of about 10% per year on heating and cooling by turning your thermostat back 7-10°F for 8 hours a day. Smart thermostats add scheduling automation and some utility rebate programs, but the savings come from the setback schedule itself, not the brand.
My utility bill is $300+ in summer. Can a new system really make that much of a difference?
It can, depending on your current system’s age and SEER rating. Older units often run at 8-10 SEER, while modern high-efficiency models reach 16-20 SEER or higher. Upgrading from a 10 SEER to a 16 SEER system can cut cooling energy consumption by roughly 37%. Proper sizing matters too: an oversized unit short-cycles, wastes energy, and struggles with dehumidification. Ask for a load calculation before any replacement quote to confirm the right capacity for your home.